Microsoft SSO
Integrating Microsoft SSO with Osano
Connecting to Microsoft SSO
In order for Osano to discover data stored in your systems, we must connect to those data providers via an API. We require, at minimum, read-only access to establish a connection to these providers. Each provider you connect may require different information. Please see the linked vendor documentation for instructions on where and how to obtain this data.
Prerequisites
- Have your Client ID, Tenant ID and Client Secret ready.
- Make sure you have the following permissions for your application in your Microsoft Azure portal.
Application.Read.All
Steps to create a new application in Microsoft Azure portal
- Sign in to Microsoft Azure and search for
App Registrationto open the App Registration blade - Next, a new application is created by clicking
New registration. During the setup, you provide a name for your app and accept the defaults if you're configuring your app for a single tenant. - Once the app is created, you go to
Manage > API permissionsand add a permission. Specifically, you selectMicrosoft Graph,Application Permissions, and search forApplication.Read.All. After checking the box for that permission, you clickAdd permissions. You will then need to grant Admin consent. - Under
Manage > Certificates & Secrets, you selectNew client secret, provide a description, set an expiration date, and generate the secret. It's important to note that the value of the new secret will disappear if you navigate away from theCertificates & Secretspage, so you should copy these values and store them in a secure location.
Step by step guide
-
Access Data Mapping Settings:
- Navigate to the Data Mapping page in the Osano application.
- Select Sources from the left-hand navigation menu.
-
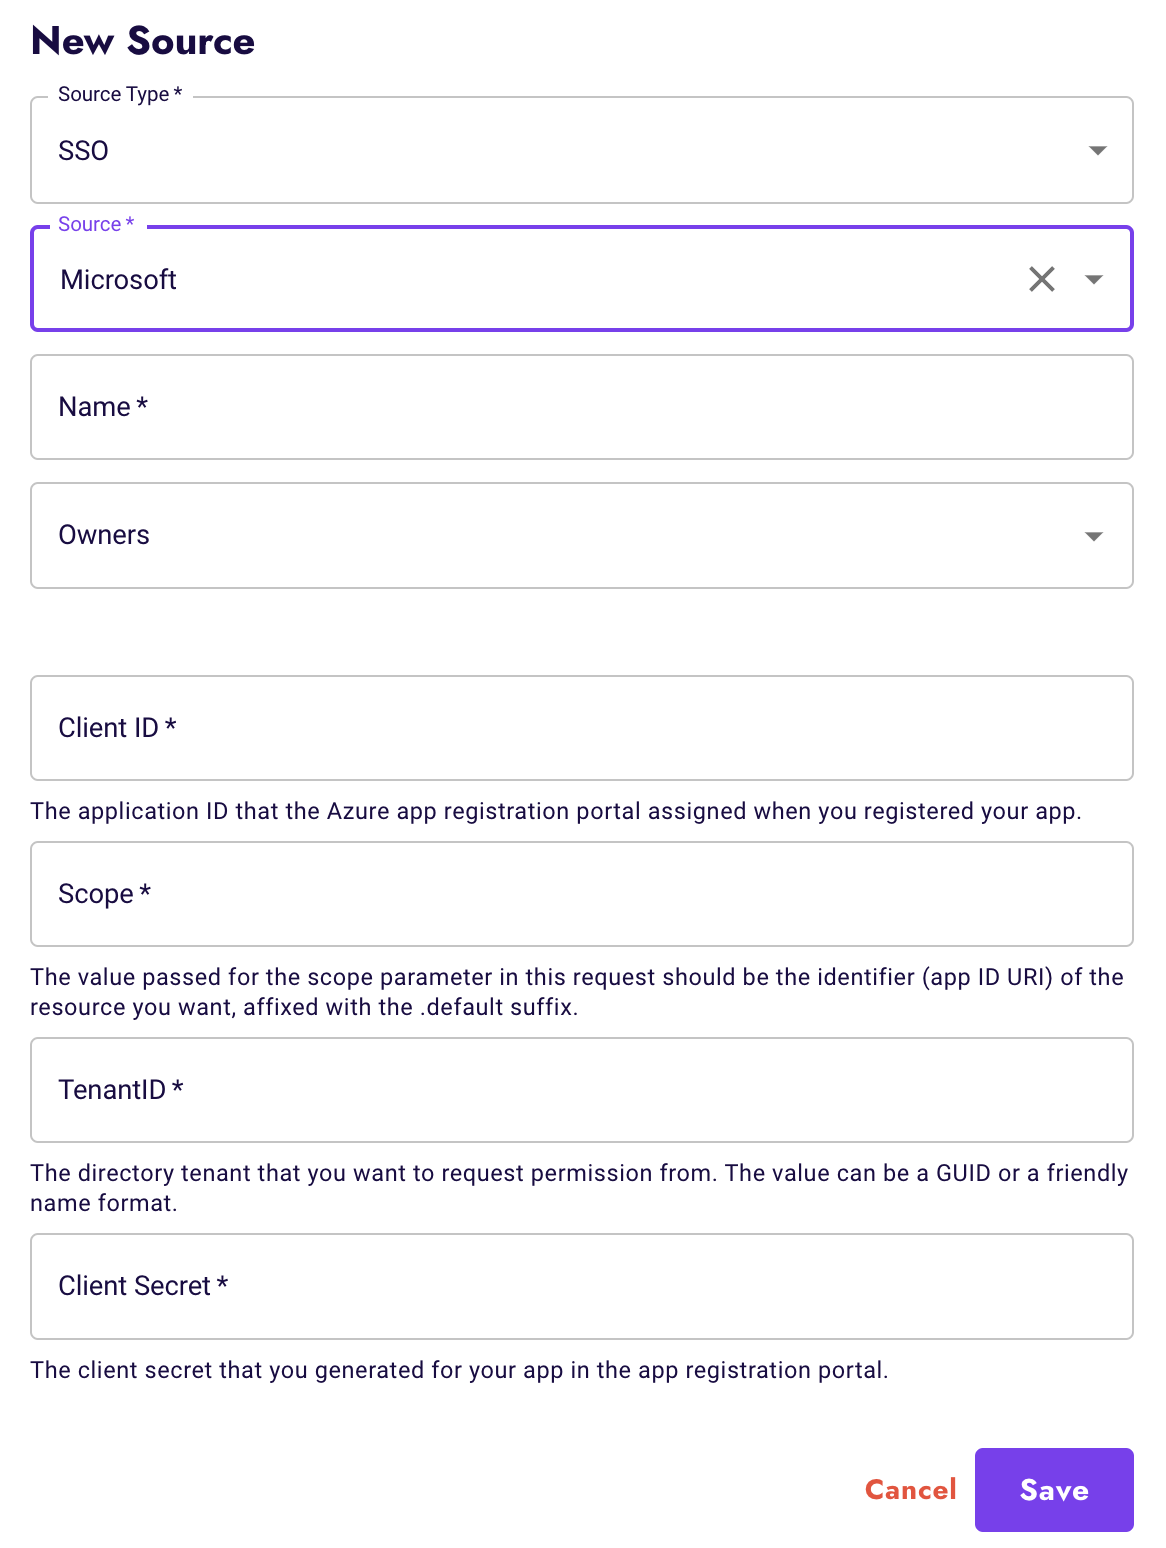
Select SSO as Source type
-
From the available SSO sources, select
Microsoft. -
Configure Microsoft SSO Integration:
- Follow the on-screen instructions to configure your Microsoft SSO integration.
- Enter your Client ID, Tenant ID and Client Secret.
- Note that for the
Scopefield, you will need to enterhttps://graph.microsoft.com/.default. - Click Save.
-
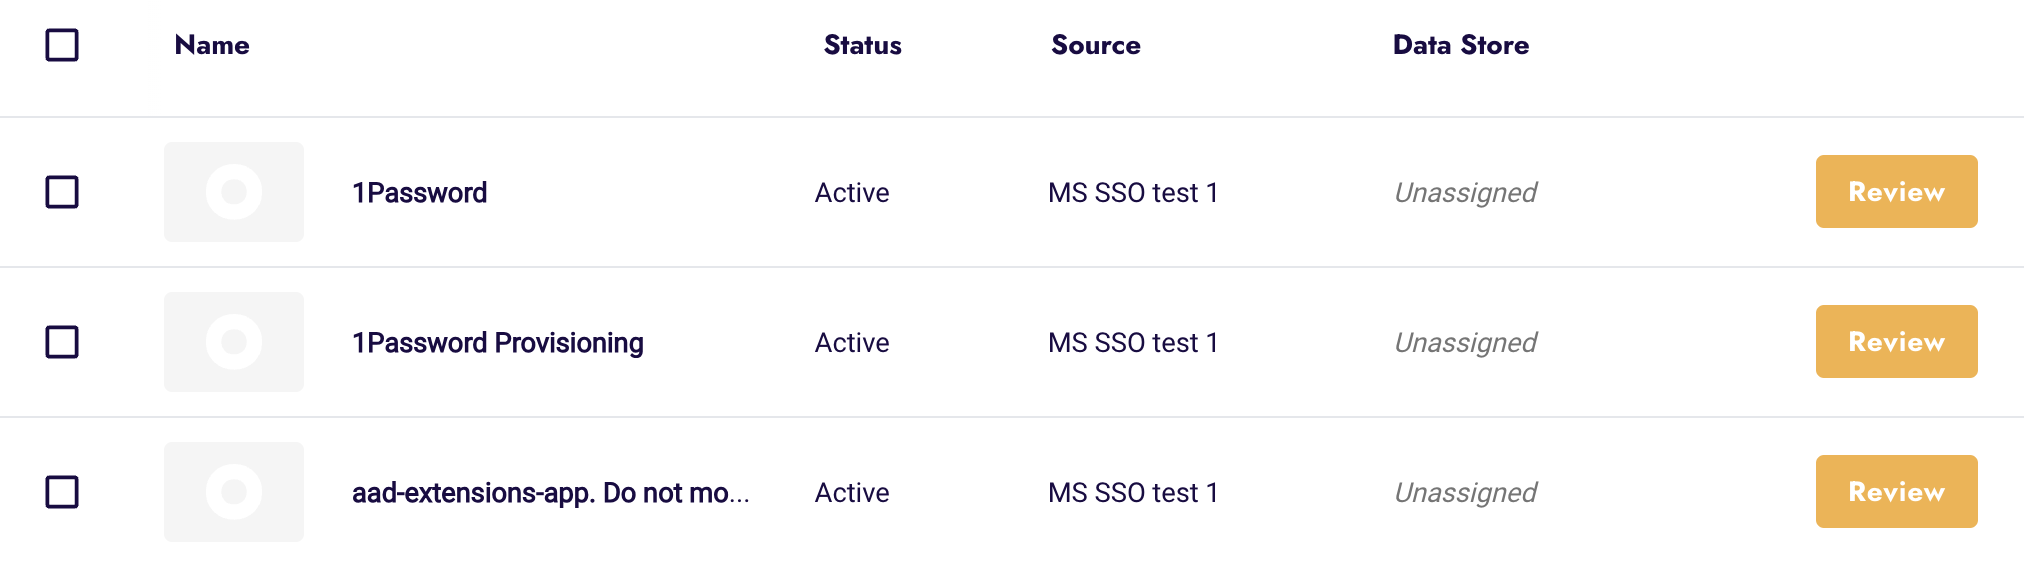
View Microsoft SSO Integration:
- Once saved, you will see your Microsoft SSO integration in the list of configured SSO sources.
- Your integration will include apps that already exist in your Microsoft Azure portal.
-
Click into the Applications to view the applications that synced from Microsoft.

-
Create a new data store:
- To proceed with creating a new data store, click on
Review. - Follow the prompts to create a new data store.
- To proceed with creating a new data store, click on