Creating a Webhook for Slack
What do you want your webhook to do?
Scenario:
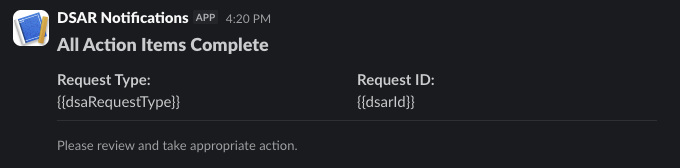
As a Data Request Manager, you currently receive daily email summaries when DSAR requests are email-verified. These emails are often delayed and mixed with other messages, making it hard to act promptly. You want to be notified immediately via Slack, when all action items on a DSAR are complete so you can review the request right away.
Solution:
Use a Webhook to Send Slack Notifications When DSAR Action Items Are Complete
To set this up, you’ll need to create a Slack app and configure a webhook. Start by reviewing the Slack Webhooks documentation.
Step 1: Create Slack App
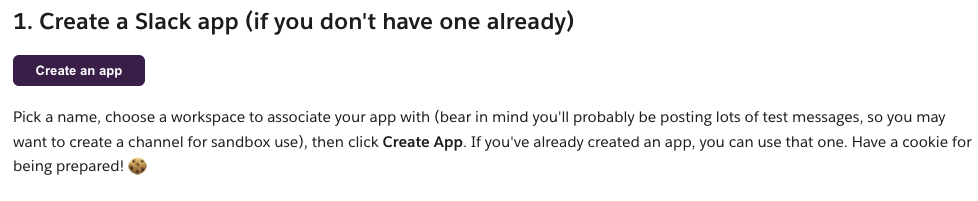
First you need to create a Slack app that will host the messages sent from Osano. Click the Create an app button within the Slack webhooks documentation page.
Step 2: Choose How to Create Your App
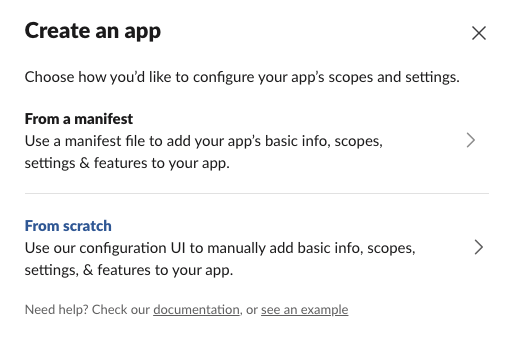
Select From scratch to build a new app.
Step 3: Name Your App & Select a Workspace
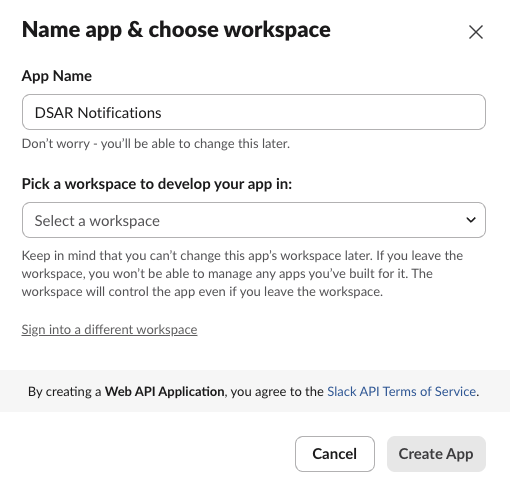
Give your app a name and choose the Slack workspace where notifications should be sent. Then click Create App.
Step 4: Add Incoming Webhooks
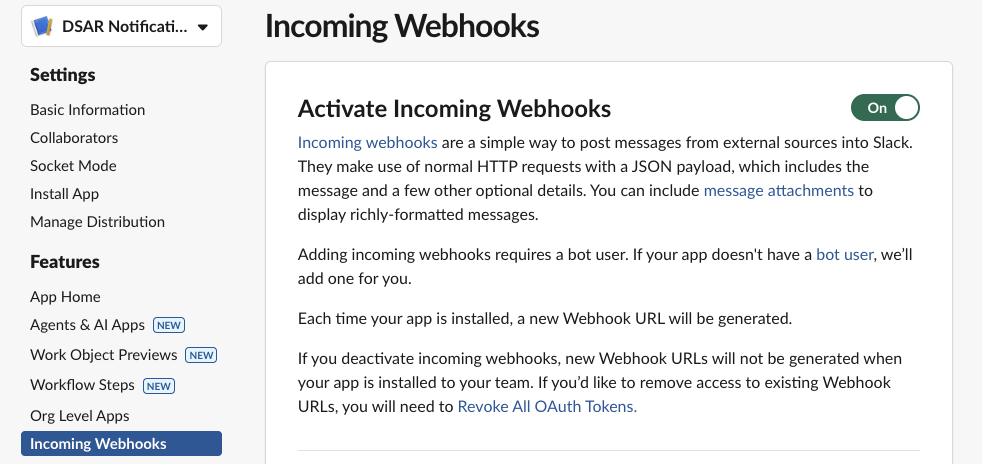
In the app’s Features tab, click Incoming Webhooks and toggle the switch to On to activate incoming webhooks.
Step 5: Add App to Workspace
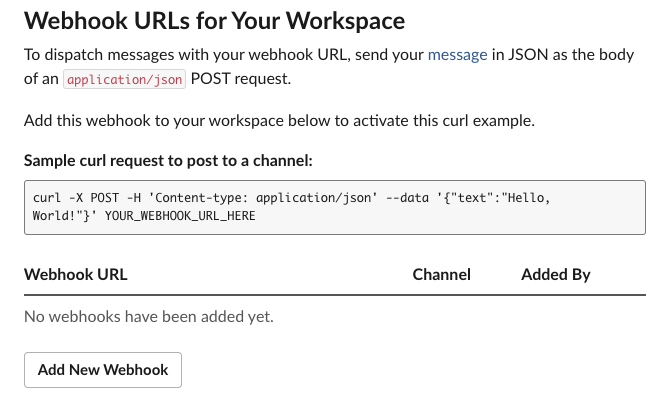
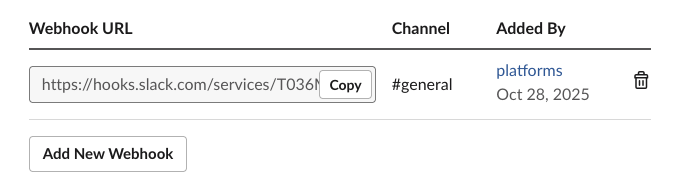
Click the Add New Webhook button to create a new webhook. Install the app if prompted. Once the app has been installed, there should be a new entry with a Webhook URL. Click the Copy button next to the webhook url as we'll need this later.
Step 6: Create Webhook in Osano
Navigate to the Webhooks section on my.osano.com and create a new webhook.
App and Event
Under the App and Event section, select Subject Rights as the product and Action Items Completed as the event.
Actions
For the method and url, select POST and enter your Slack webhook url from Step 5
- Method: POST
- URL: <YOUR_SLACK_WEBHOOK_URL>
Content
Slack requires a specific JSON structure for messages. Below is a sample payload using Slack’s https://docs.slack.dev/block-kit/ format. You can customize it further using supported variables listed on the variables page.
{
    "blocks": [
        {
            "type": "header",
            "text": {
                "type": "plain_text",
                "text": "All Action Items Complete",
                "emoji": true
            }
        },
        {
            "type": "section",
            "fields": [
                {
                    "type": "mrkdwn",
                    "text": "*Request Type:*\n{{dsaRequestType}}"
                },
                {
                    "type": "mrkdwn",
                    "text": "*Request ID:*\n{{dsarId}}"
                }
            ]
        },
        {
            "type": "divider"
        },
        {
            "type": "context",
            "elements": [
                {
                    "type": "mrkdwn",
                    "text": "Please review and take appropriate action."
                }
            ]
        }
    ]
}
Handling missing variables in Block Kit
Slack's Block Kit validates every field in the payload. Required text fields such as the text property in header and section blocks must contain at least one character — Slack will reject the entire message with an invalid_payload or invalid_blocks error if any of these fields resolve to null or an empty string.
Because Osano replaces unresolved template variables with null or removes them (see Functions — Unresolved Variables), a Block Kit payload that places a variable as the sole content of a required text field could fail delivery if that variable is missing at runtime.
To avoid this, use the coalesce or pipe fallback syntax (see Functions — Default / Fallback Values) for any variable used inside a Block Kit text field:
{
    "type": "mrkdwn",
    "text": "*Request Type:*\n{{dsaRequestType | 'N/A'}}"
}
This ensures the field always contains a valid string, even when the variable is unavailable.
Result: Real-Time Notifications for DSAR
Now click the Test button in the content section to verify your webhook sends a message to the channel you selected.