Subject Rights Consumer SSO
Learn to set up your SSO provider with your subject rights form. Refer to the guide below for instructions and supported providers.
Setup
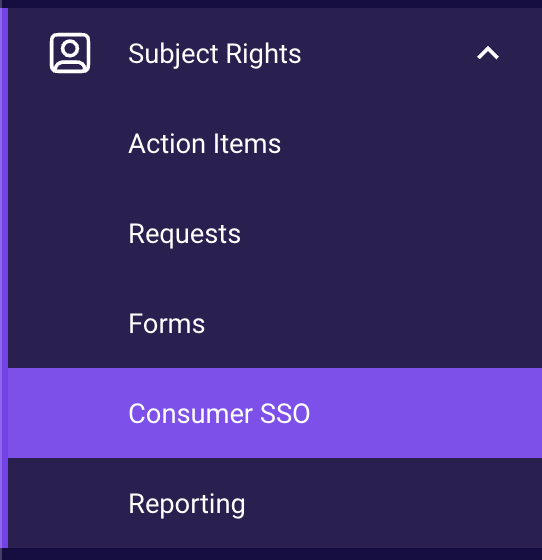
First, navigate to the "Consumer SSO" tab under Subject Rights.
Then click the 'plus' icon at the bottom right of the list of SSO configurations to create a new configuration.
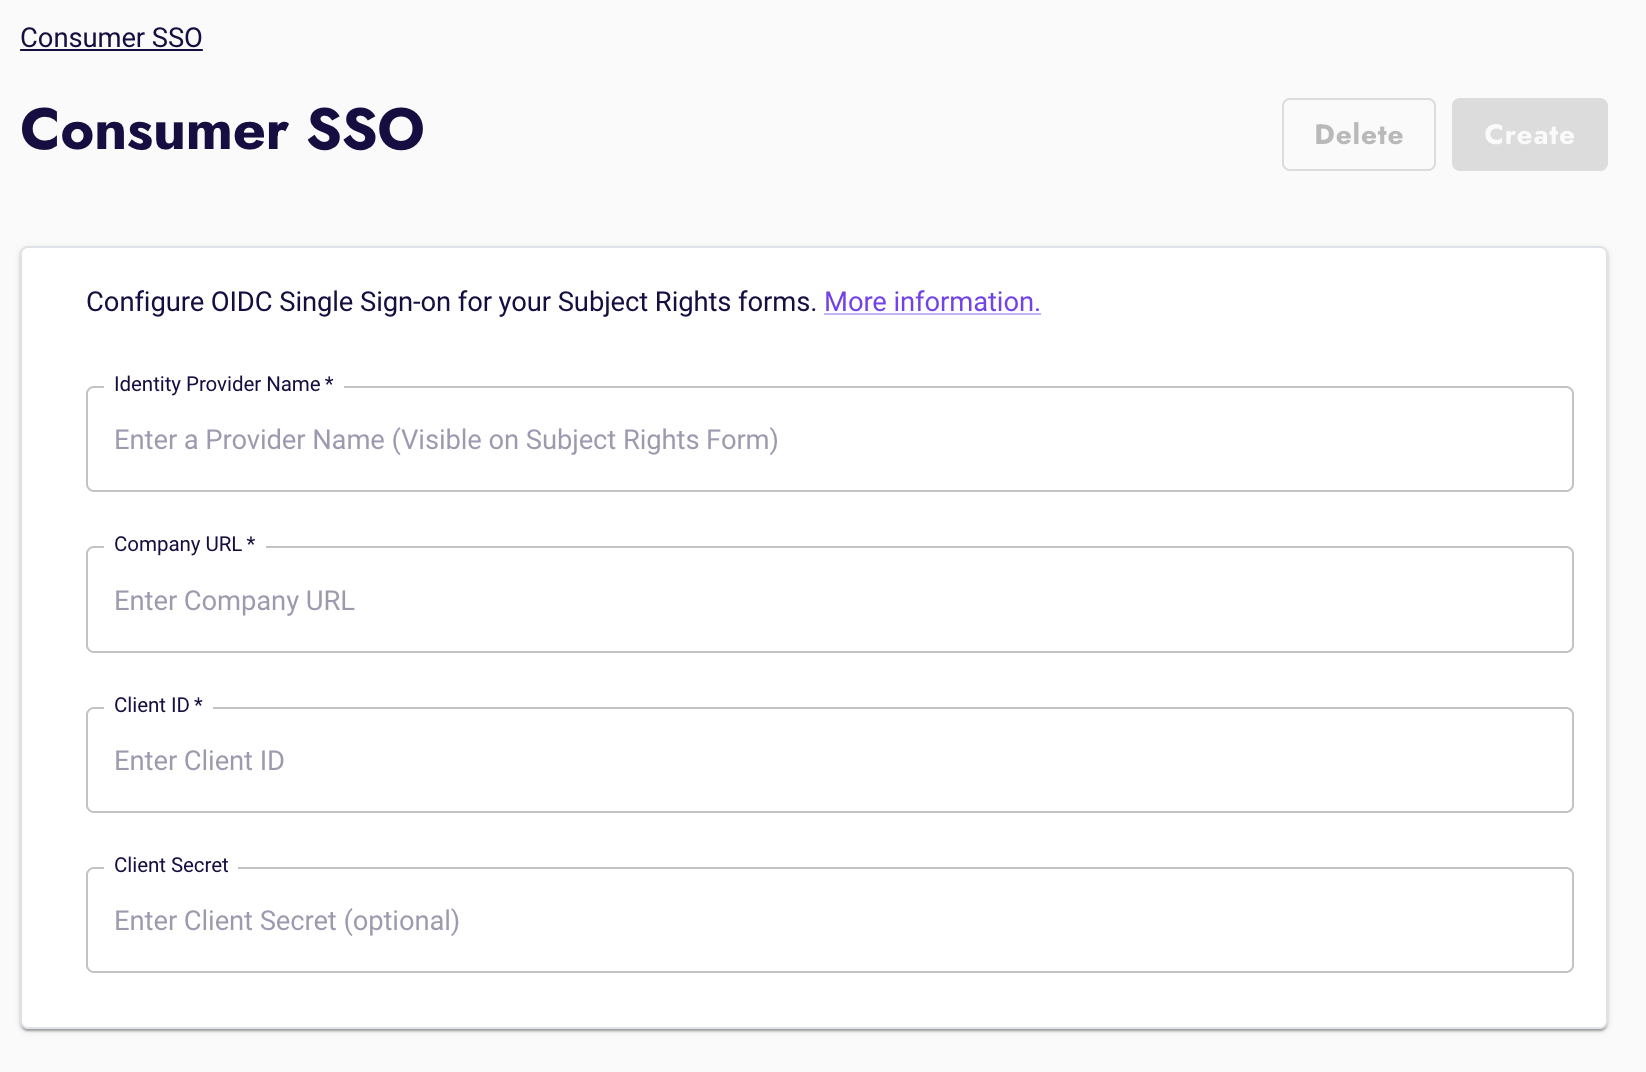
Fill out the following fields, and refer to the specific documentation below for help.
Provider Name- This will appear on the Subject Rights form as:
Login with <Provider Name>
- This will appear on the Subject Rights form as:
Company URL- Examples:
- For Okta:
https://osano.okta.com - For Microsoft:
https://login.microsoftonline.com/42fe7ae3-d37d-41c0-85b3-116586e92863- Please use your Tenant ID (UUID) instead of the Tenant name.
- For Okta:
- Examples:
Client ID- Refer to the documentation below for instructions on where to find this.
Client Secret- Refer to the documentation below for instructions on where to find this.
Next, navigate to the form of your choice and go to the form settings.
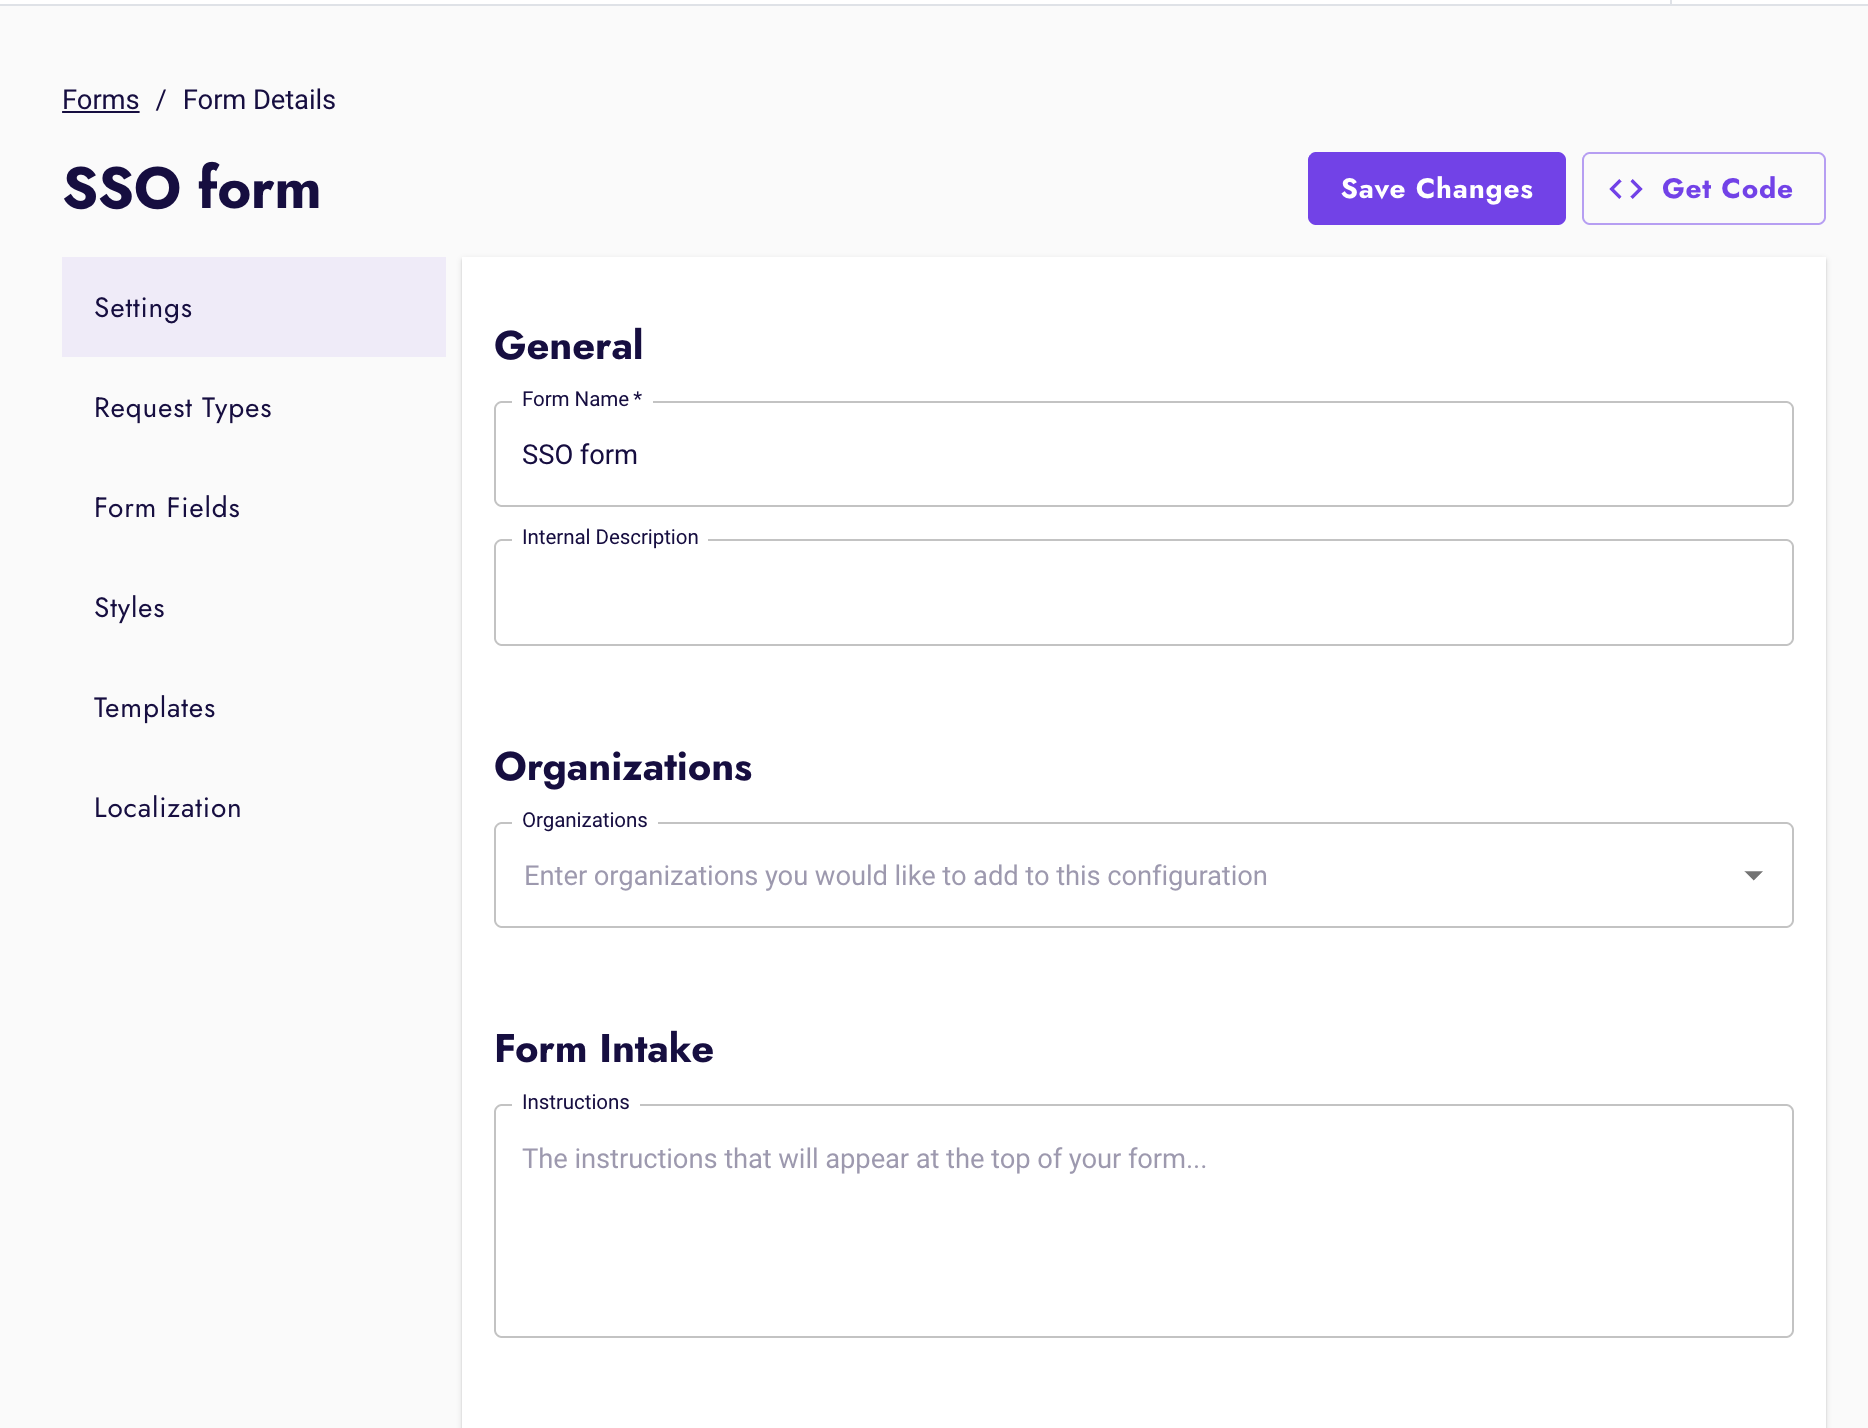
Then enable Consumer SSO and select the SSO provider you just created.

Please note that if you require a login to access the form, you may still need to allow users without a login to make a subject rights request on a different form.
Finally, navigate to your form to test the configuration.
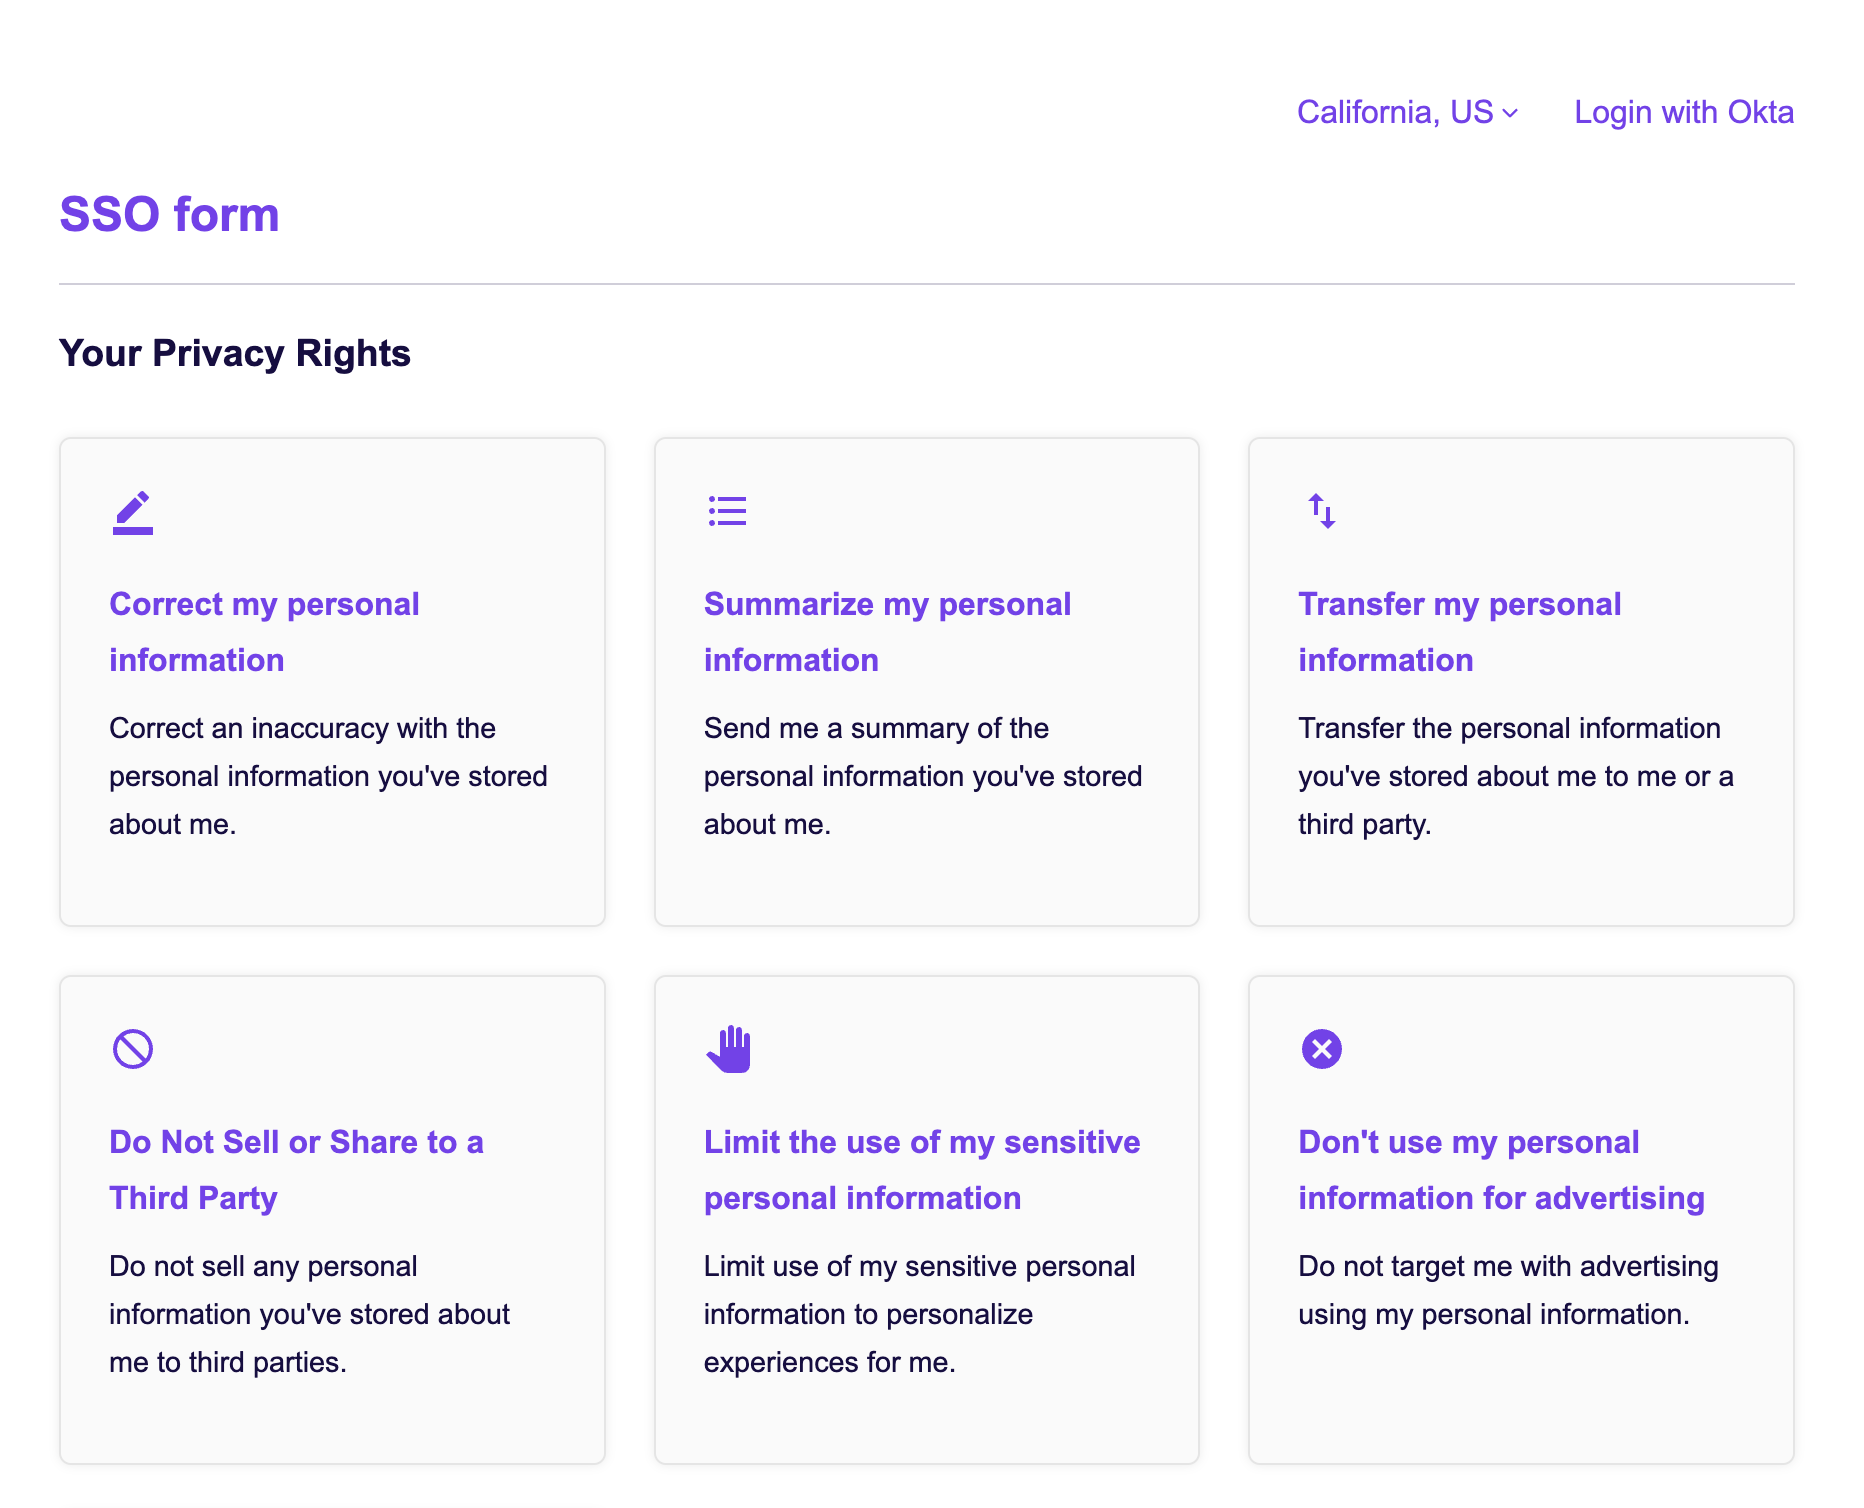
If login is required (default), it will restrict access to the form unless a user is logged in.
If login is not required, a login option will appear next to the location selector.
It will display "Hi, NAME" to indicate that a user is logged in.
Supported Platforms (updated 12/23/25)
- Microsoft Entra ID
- Okta
Other SSO providers may work, but have not been confirmed at this time.
Microsoft SSO
- See Microsoft's documentation here.
- Ensure the redirect URI is set to the type
Weband contains the value: https://api.osano.com/auth/sso/oidc/callback - Note the Tenant ID and Client ID.
- Create a client secret using the
Certificates & Secretstab. Note the client secret as it will not be visible again. - Use these values when setting up the form in Osano's
Consumer SSOtab.
Okta SSO
- Create a new app integration
- Select "OIDC - OpenID Connect" and "Single Page Application"
- Ensure Proof Key for Code Exchange (PKCE) is selected.
- Ensure the redirect URI is set to the value: https://api.osano.com/auth/sso/oidc/callback
- Note the Client ID. The client secret is not necessary if Proof Key for Code Exchange is selected.